


Project management helps teams organize and prioritize tasks to better achieve business goals. To handle the complex processes involved in projects like developing an app or onboarding a new employee, you need a modern project management platform.
Jira is amongst the most established, powerful, and feature-complete project management tools available. It is straightforward to set up and available both on the cloud and on premises. And its native project management capabilities can be — and often should be — heavily customized and enhanced by a wide variety of plugins to meet development, tracking, budget management, and Scaled Agile Framework (SAFe) needs.
This is a complete guide to project management in Jira, from setting up your first project to customizing it to fit your organization’s needs.

Why use Jira for Project Management?
Project management is a practice that involves planning, executing, and monitoring all of the processes and tasks required to reach a set business goal. While all three versions of Jira — Core, Software, and Service Desk — are robust project management tools, Jira Software is required to take advantage of Jira’s agile capabilities, like Scrum and Kanban boards.
Jira was originally developed by Atlassian to meet the needs of software development teams, but it is now well-equipped to handle almost any project management use case. Here are just a few examples of how you can jump start project management in your organization using Jira:
- Create and customize workflows to deliver consistent results. Every project depends on workflows that will keep teams on schedule and reliably produce the expected outcome, and Jira’s workflow-related features are among its most valuable for project management. Administrators can customize the steps and resolutions of workflows and have a high level of control over how and when workflows transition from one step to the next.
- Discover valuable insights. To effectively manage ongoing projects, you need to be able to track the personnel and resources allocated to each and assess where work stands at a glance. Jira’s reporting and visualization features give you a real-time perspective on team performance, which makes it easier to meet deadlines, adjust workloads, and improve efficiency.
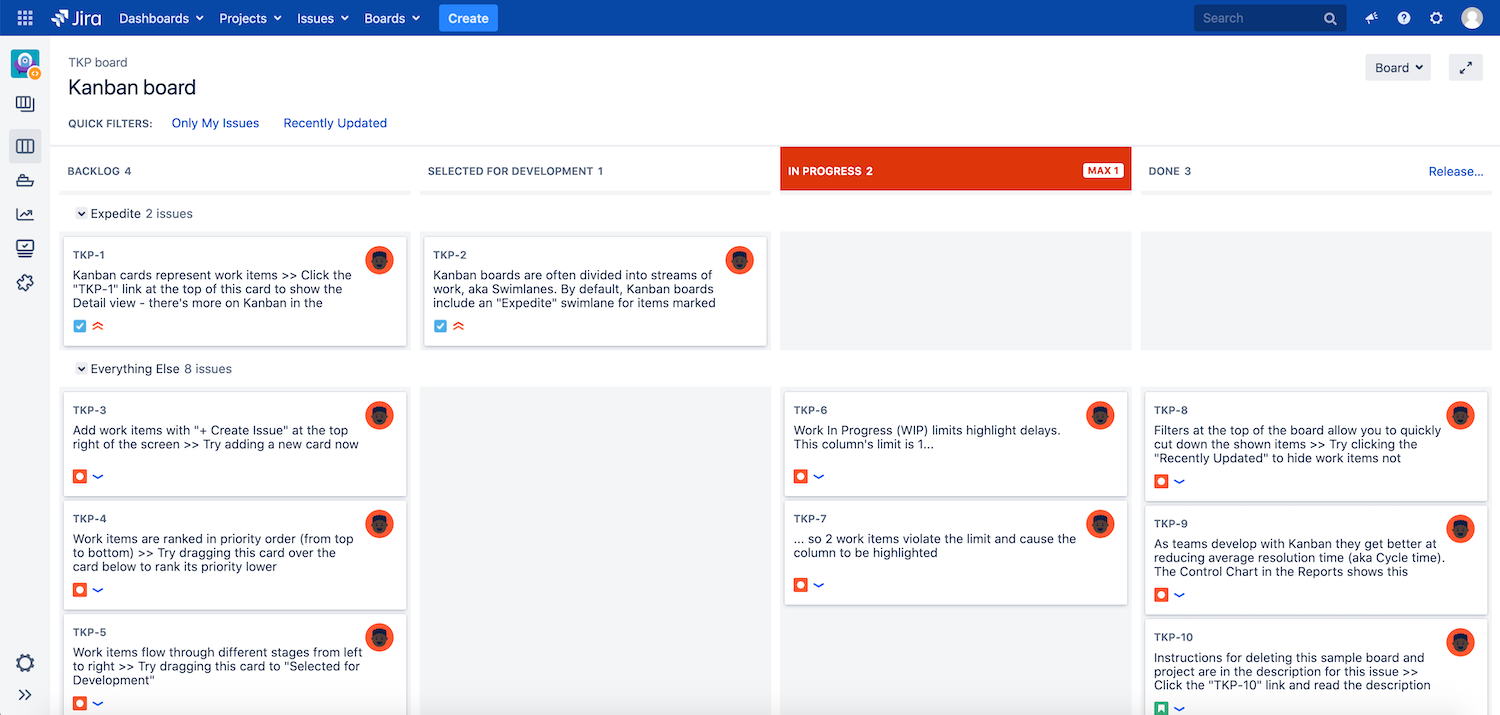
- Practice agile project management. Jira Software’s agile capabilities are a great boon for project management. An agile approach emphasizes quick responses to change, effective collaboration, and the successful completion of projects over painstaking documentation. Jira Software users can choose either Scrum, an agile framework focused on simplicity and self-organization, or Kanban, which is centered around the use of Kanban boards that allow anyone to quickly organize and track tasks.
- Choose from hundreds of available plugins. Jira’s native project management capabilities can be enhanced with many useful plugins. For example, you can take advantage of the road mapping features available through addons like Portfolio for Jira, further automate Jira using an app like ScriptRunner, or improve reporting on your projects with a plugin like eazyBI Reports and Charts.
- Improve alignment and collaboration among team members. It’s easy to lose track of projects as they move from one team member — or department — to another, or for processes that are codependent to stall due to a lack of coordination. Your team members can use Jira to both monitor their own assigned issues for each project and to see how others are progressing. They can also leave comments on issues and tag other users in them to facilitate frequent collaboration.
Once you’ve decided to use Jira to implement project management in your organization, it’s time to create your first project.
Creating a New Project in Jira
Projects in Jira are used to group units of work, which Jira calls “issues.” A simple project for writing blog posts might consist of only a few issues, each one corresponding to a single post, that all use the same workflow. On the other end of the complexity spectrum, a project for developing a complicated piece of software could encompass hundreds of issues assigned to dozens of team members that employ a variety of different workflows.
There are two types of projects in Jira Software: classic and next-gen. Classic projects feature standardized, global configurations that can be copied across multiple projects, and they can only be created by Jira administrators. Next-gen projects can be configured individually, and any Jira user can create one by default. In general, classic projects offer greater customizability than next-gen projects, which are simpler to set up and use but lack the flexibility and power provided by classic projects.
To create either type of project, follow these steps:
- Select Projects from the menu on the left side of the screen, then click on View all projects.
- Choose Create project and then either Classic project or Next-gen.
- Name the project and select its template, such as Scrum or Kanban. If you’re creating a classic project, you can copy the characteristics of another project, such as workflows and issue types, for use in your new project at this point.
- Click Create to complete the process.
User Management and Roles
To get your team members working into your new project, you need to add them to Jira as users. You can add team members by email in both Jira Cloud and Server. Keep in mind that the cost of Jira is dependent on how many users you have, so familiarize yourself with its pricing tiers before deciding who to add.
You can also assign specific roles to users on a per-project basis, which can serve a variety of useful functions. For instance, you can specify the default assignee for all issues in a project, or clearly define team members’ responsibilities for the project through roles like Bug Tester, Editor, or Developer. Make sure you communicate the meaning of roles to your team members so they have a clear understanding of their responsibilities.
Defining Permissions
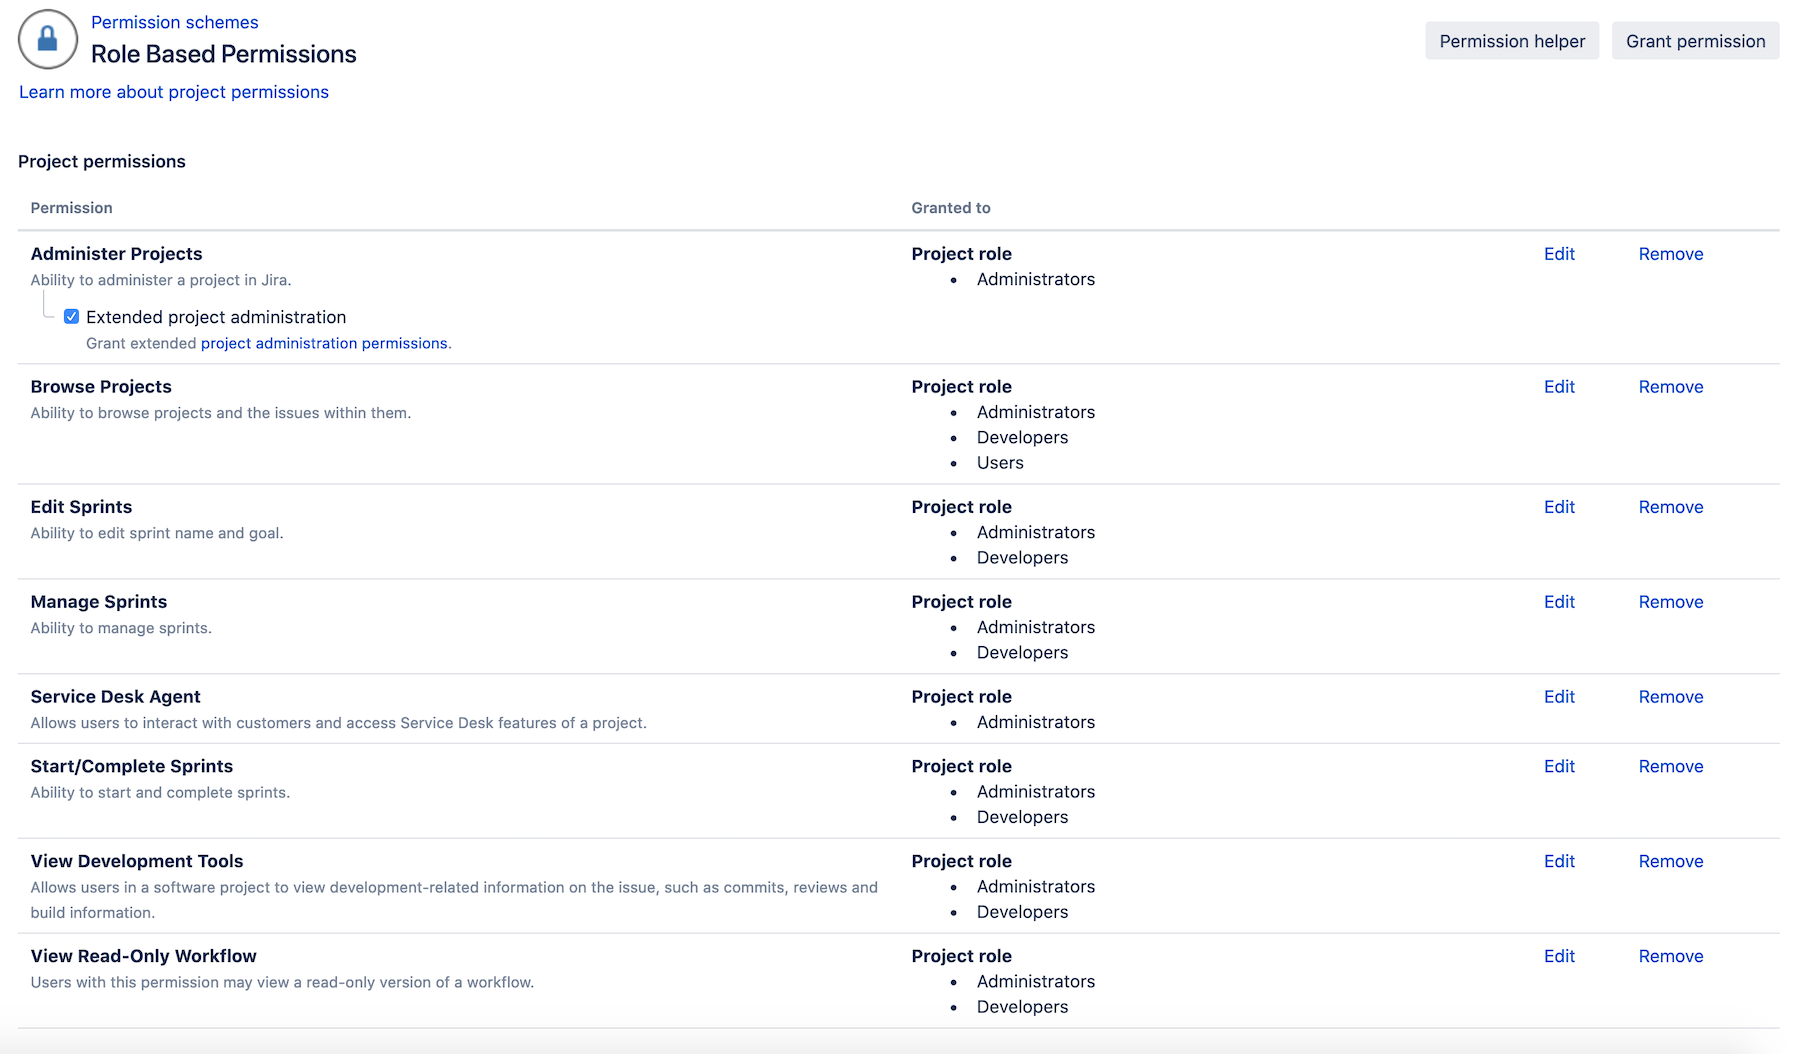
Jira administrators should also carefully tailor user permissions. These permissions include the power to create new tasks, comment in specific projects, edit existing workflows, create and delete other accounts, and more. All of these can be set per user, per project, or following a variety of more sophisticated rules by editing a project’s permission scheme. To start creating or editing permission schemes, click on the gear-like Settings icon, select Issues, and then choose Permission Schemes.

You can also hide sensitive issues from select users by defining a project’s security settings. To create a security scheme from the Issues menu, select ISSUE ATTRIBUTES and then click on Issue security schemes. Take the time to evaluate which stakeholders should see issues in Jira, and who can be trusted to perform certain operations, before defining permission and security schemes.

Handling Issues
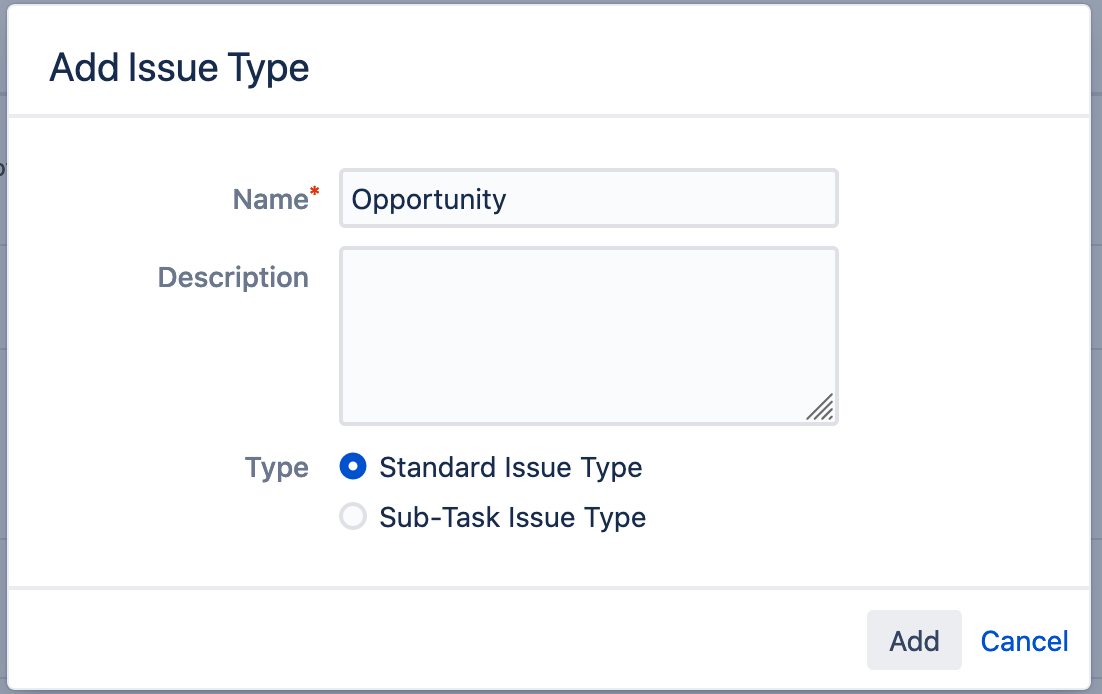
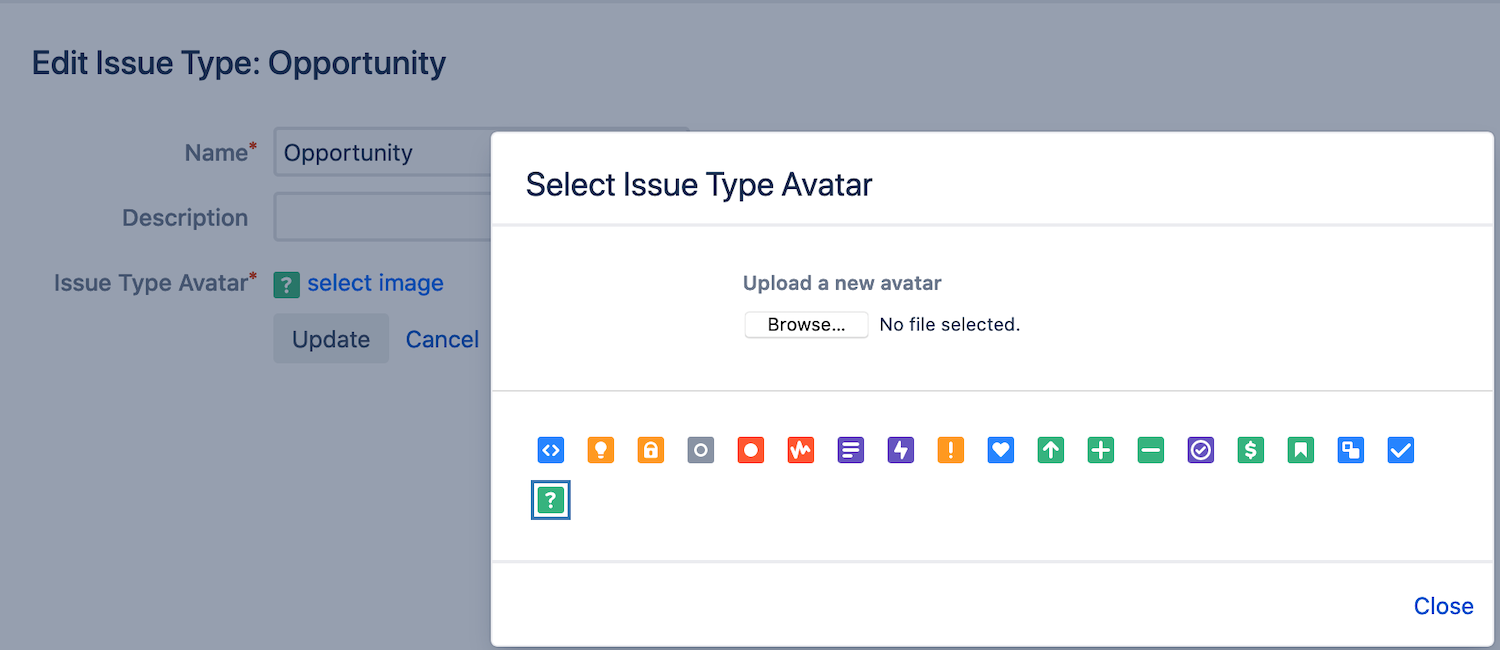
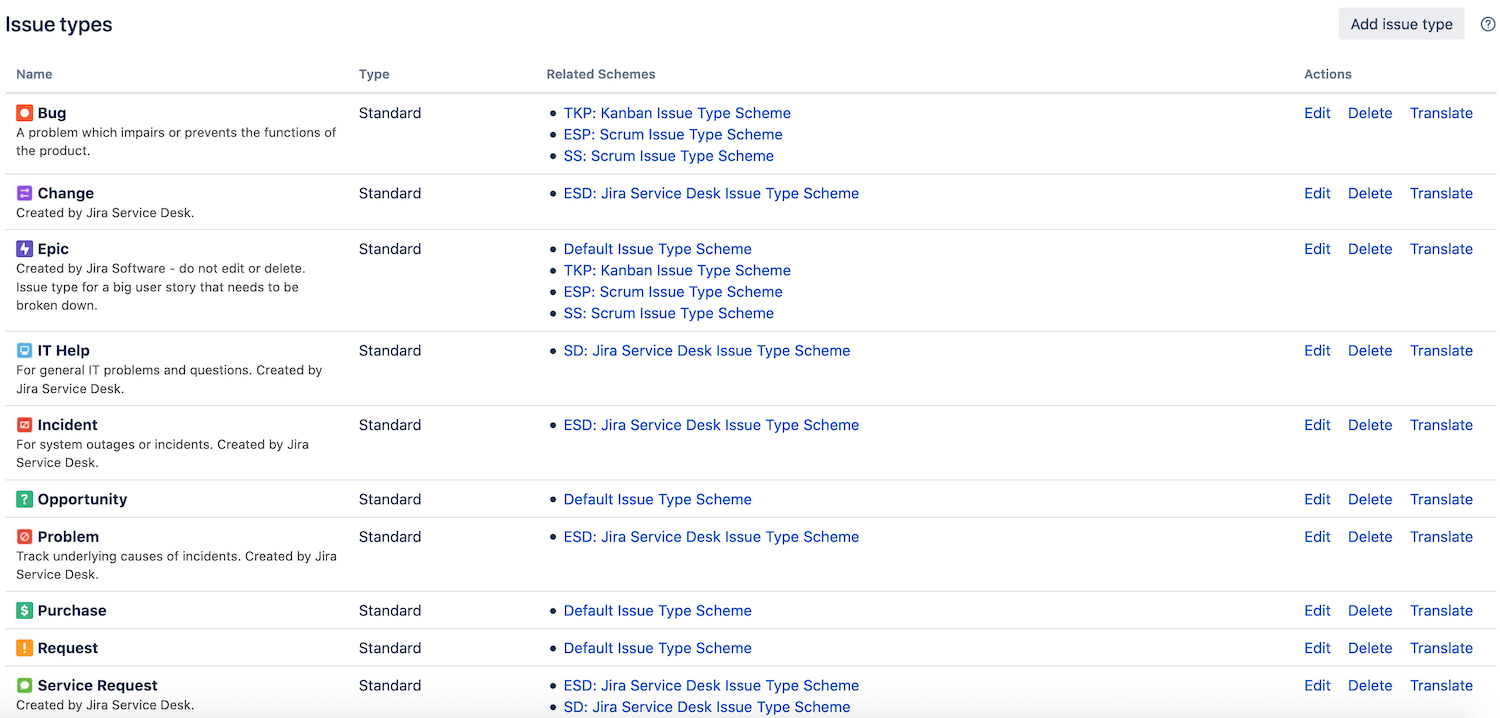
Issues in Jira encompass any unit of work below the project level, from discrete subtasks to “Epics” that may include dozens of other issues. Jira features some default issue types and allows you to define your own as well.
Creating your own issue types lets you specify what workflows those issues will use and the information they will display. To start creating or modifying issue types, select Issue type schemes from the Issues menu. Make sure that you don’t create issue types that are redundant, overly complex, or unused, as this will result in inefficiencies and potential reporting inaccuracies.
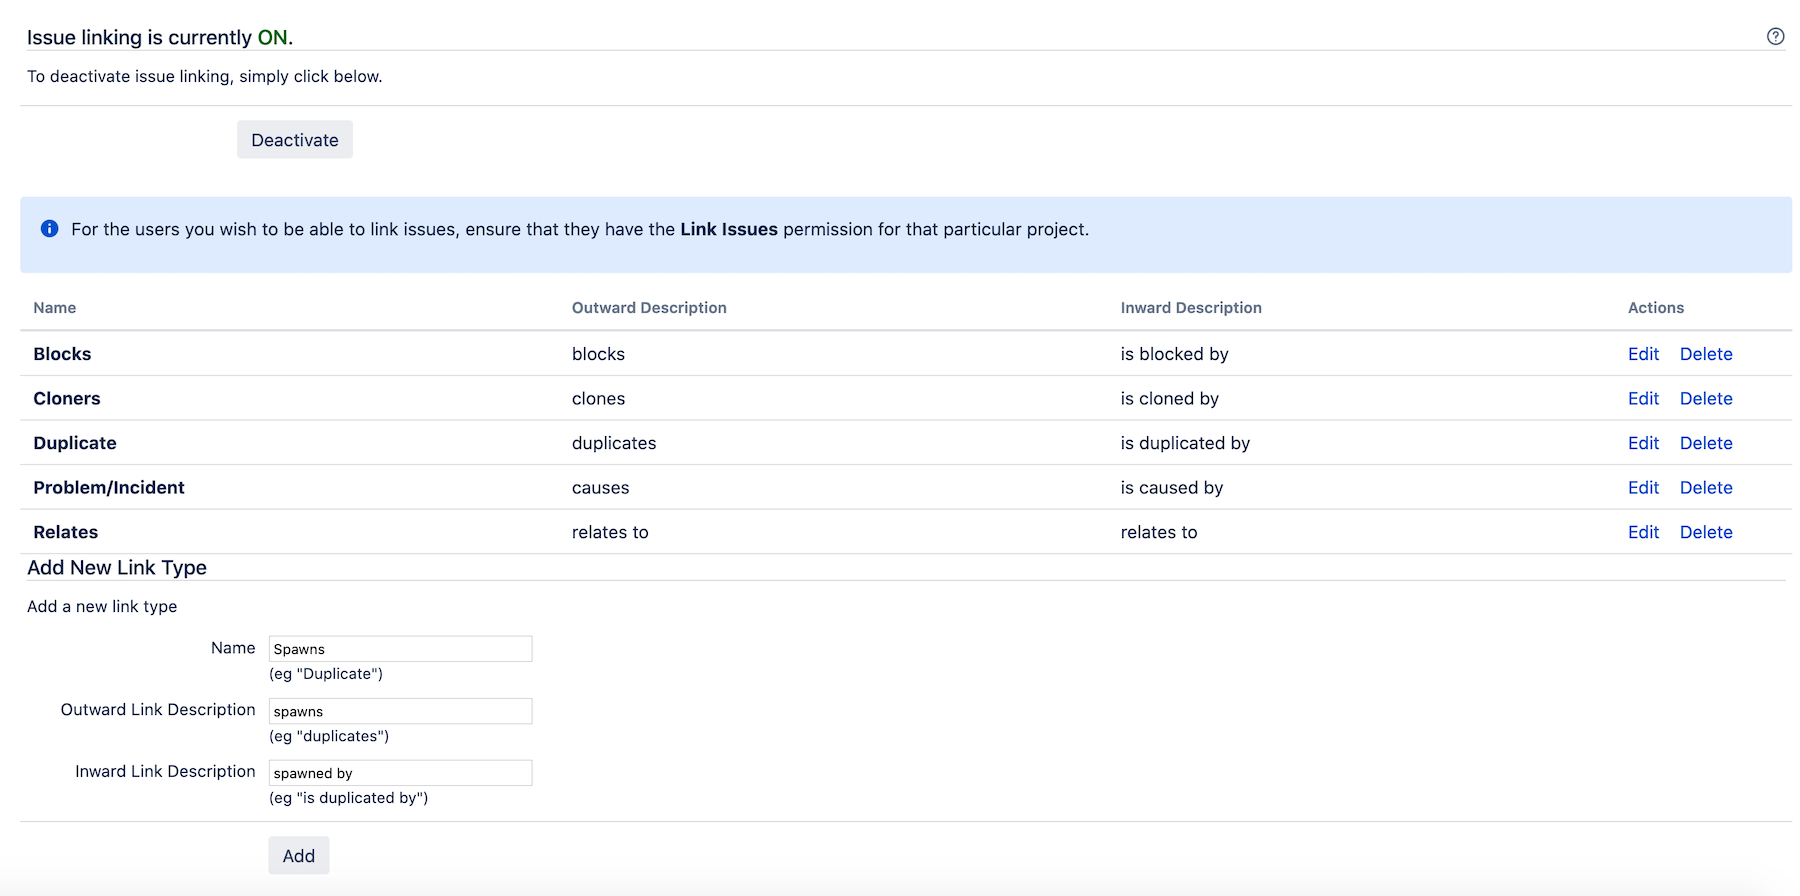
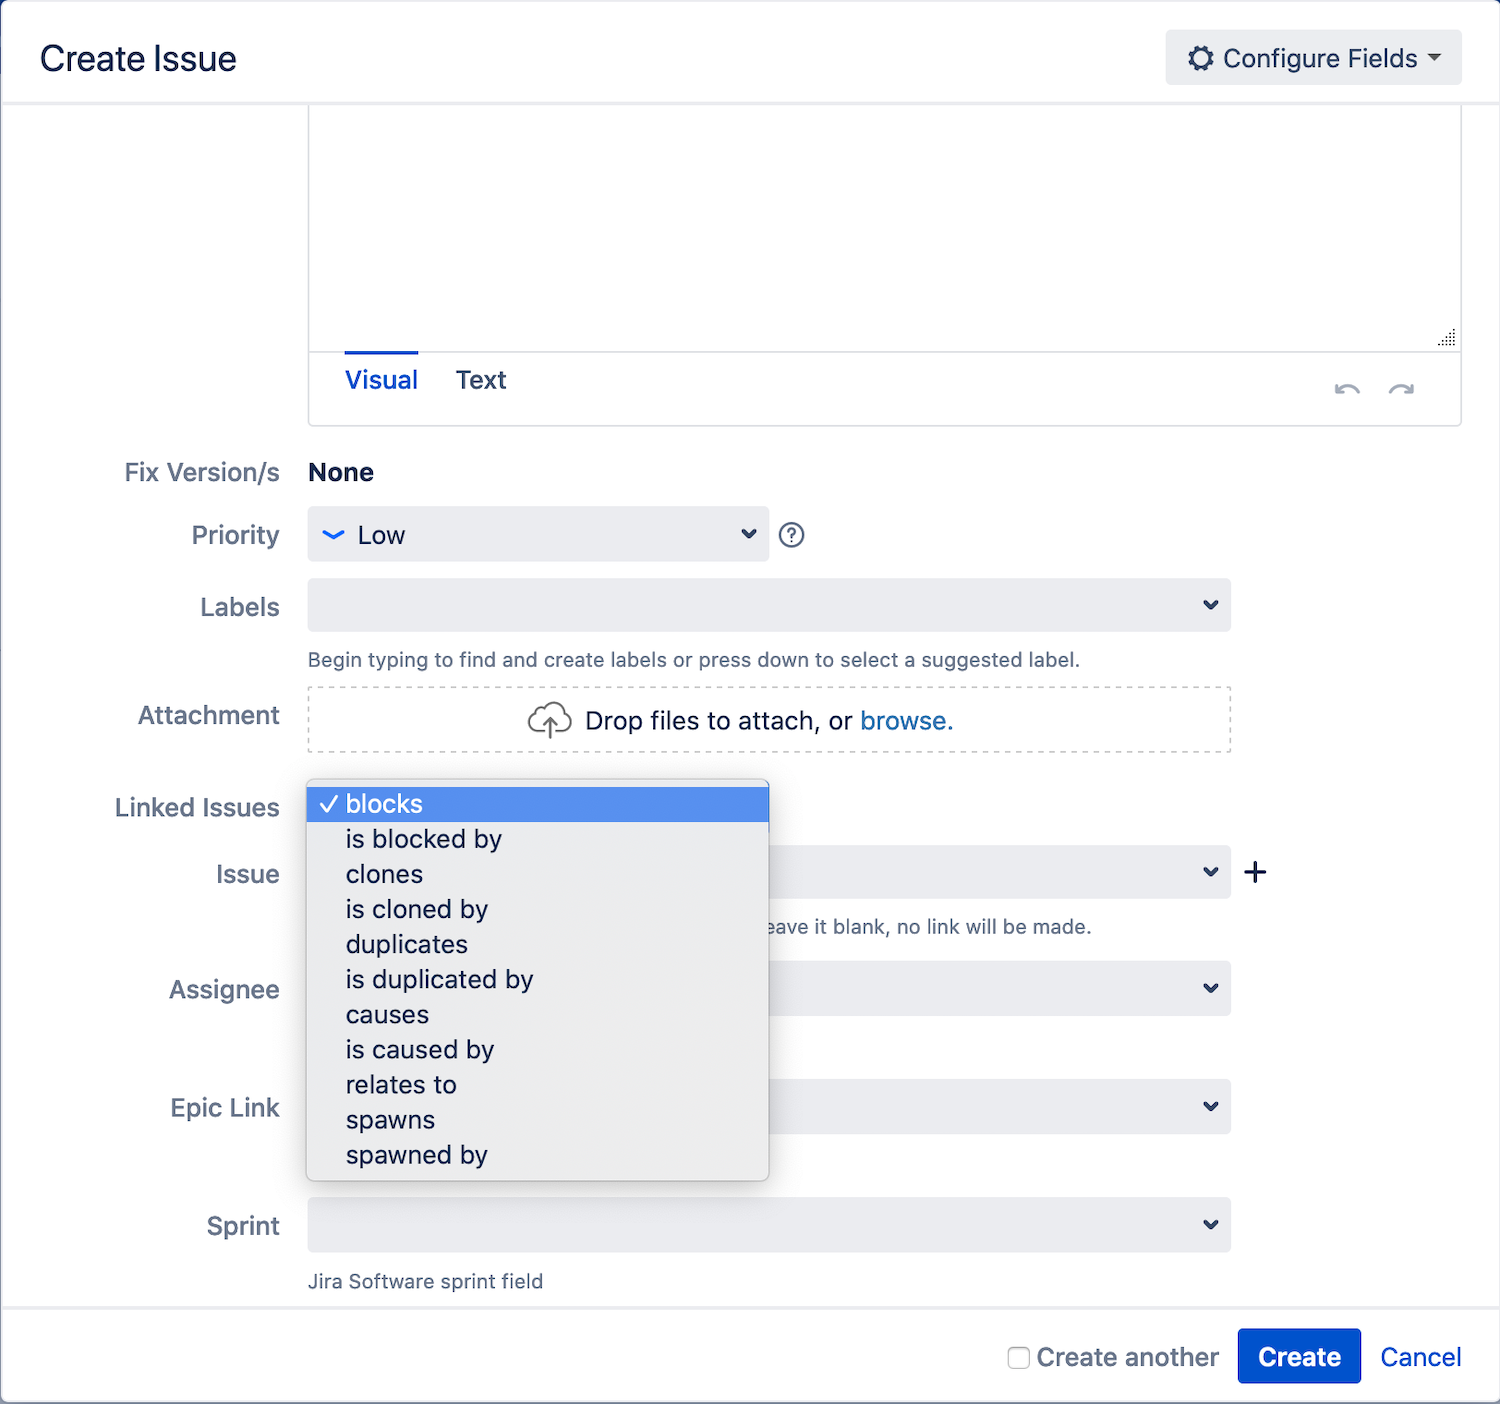
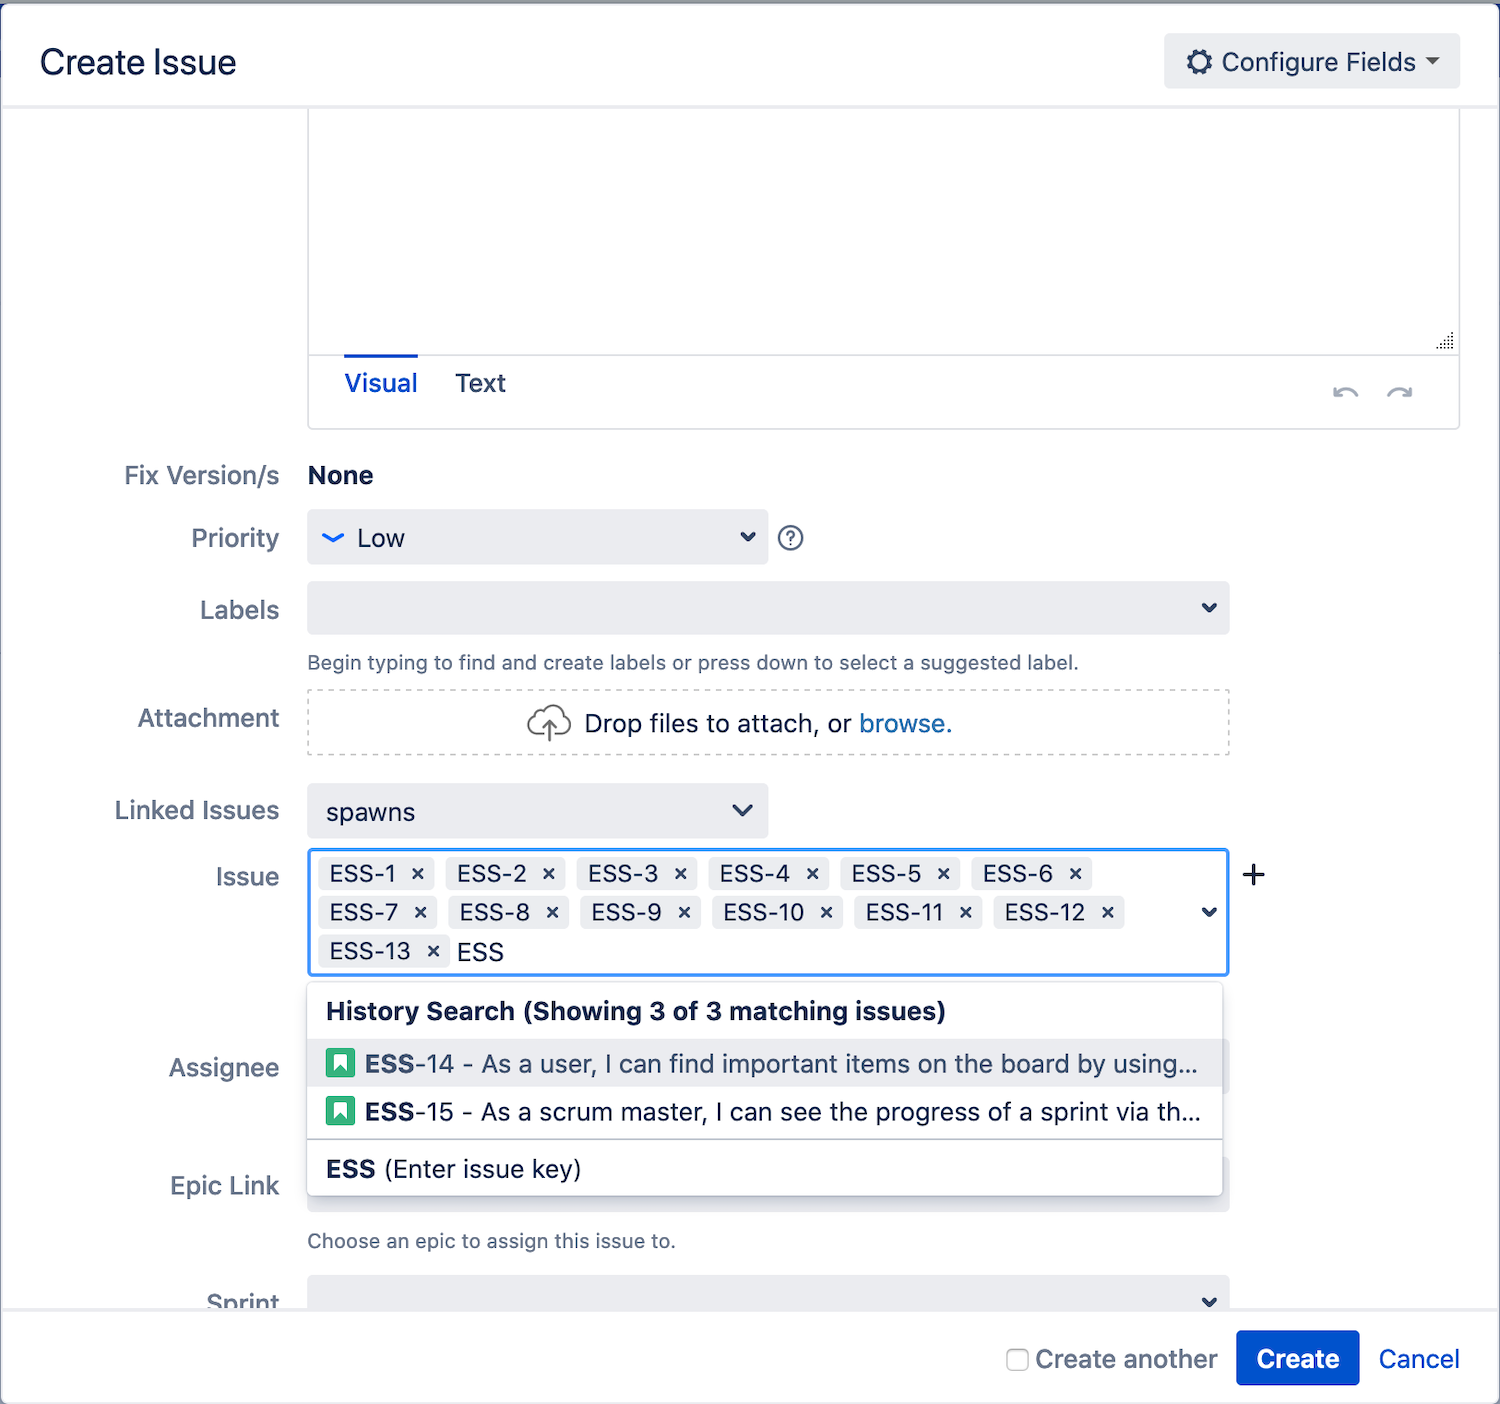
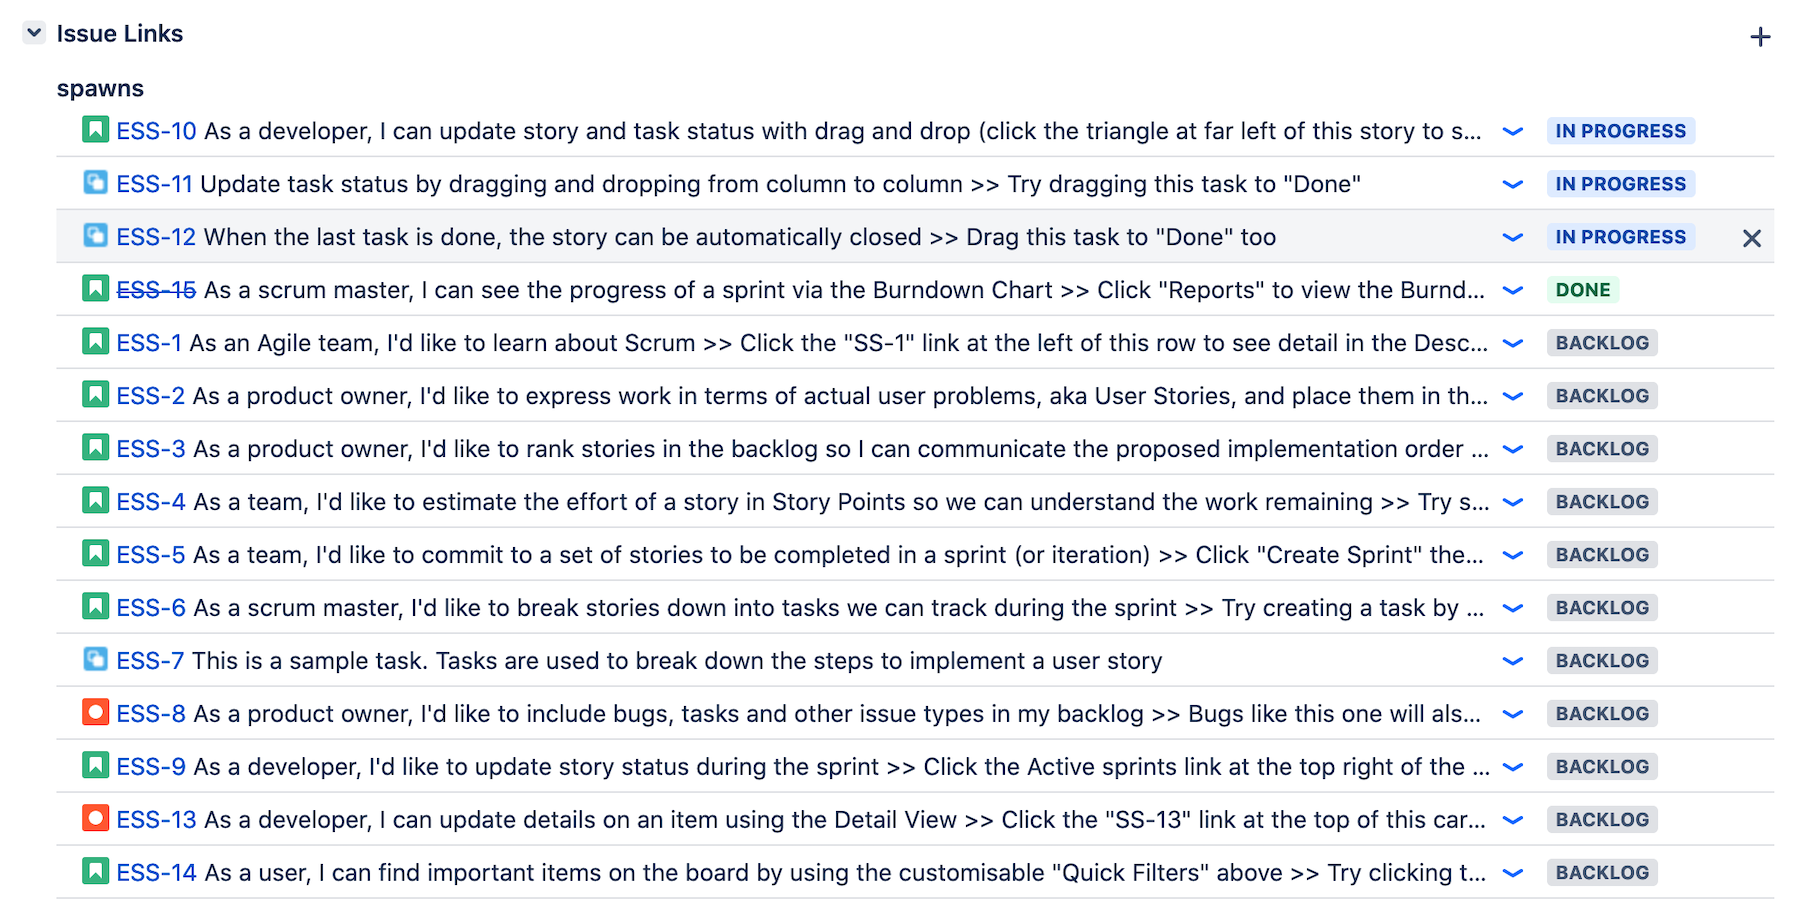
You can also link issues in Jira together to establish a variety of relationships, like “is built by,” “is duplicated by,” or “is measured by.” These links can be created from the issue screen and are a fast way to show team members how different parts of a project are related and navigate between them.
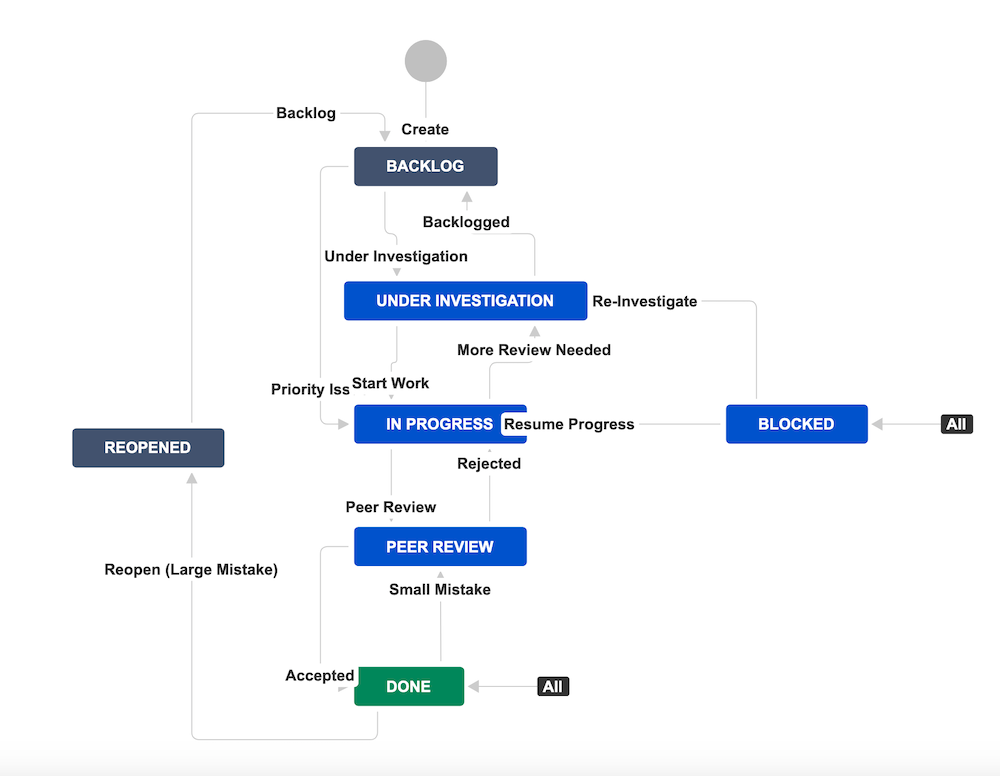
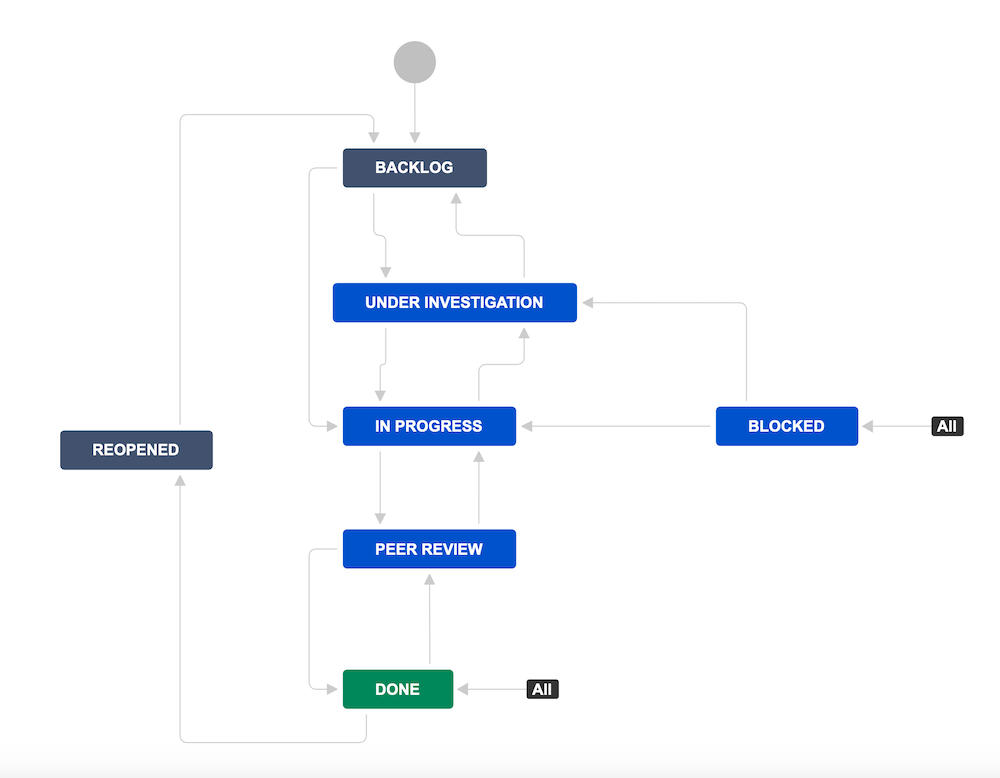
Adding Workflows
Workflows may be the most critical part of setting up your project. They define the flow of completed tasks and dependencies for a frequently performed, repeatable business process. Jira makes it easy to design custom workflows, and it also provides some default workflows to choose from.
You can connect workflows to projects by using workflow schemes. To create a workflow scheme, select Workflow Schemes from the Issues menu and click on Add Workflow Scheme. You can freely associate workflow schemes with individual projects.
One of the best ways to increase Jira’s positive impact on your team is to customize the behavior of transitions from one step of the process — called a “status” in Jira — to another. You can do so in several ways:
- Conditions must be met before a transition can occur.
- Validators require users to input specific information before transitioning.
- Post functions define other processes that must be completed before the transition occurs.
- Triggers automatically transition an issue when specific events occur.
Remember to follow general best practices for workflows when using them in Jira. They should be as streamlined as possible, describe a business process which is performed repeatedly, and reflect how the process is actually performed — or how it will be performed in the future.
To learn more about how to use workflows in Jira, take a look at our comprehensive guide on the subject.
Configuring Jira Projects
Managing projects in Jira doesn’t stop after completing the initial setup. There many ways you can further optimize Jira for project management.
Components
If issues within a project are becoming difficult to manage, you can group some together by using components. While components shouldn’t be overused, as they add additional complexity to your project, they provide a quick way to organize issues and allow you to define different default assignees for issues in the same project. For example, a project for creating a new product might involve issues related to design, manufacturing, and marketing, and you could create components for each.
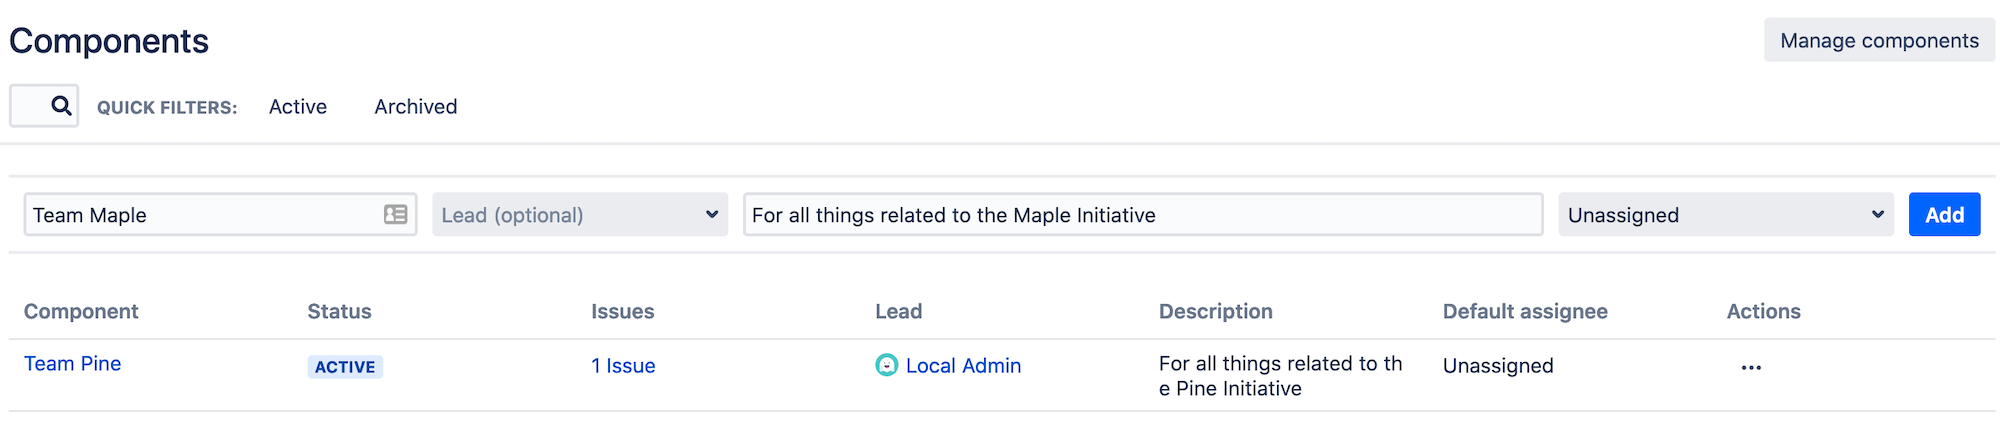
To add a component, click on Components when viewing your project and choose Create Component.
Fields
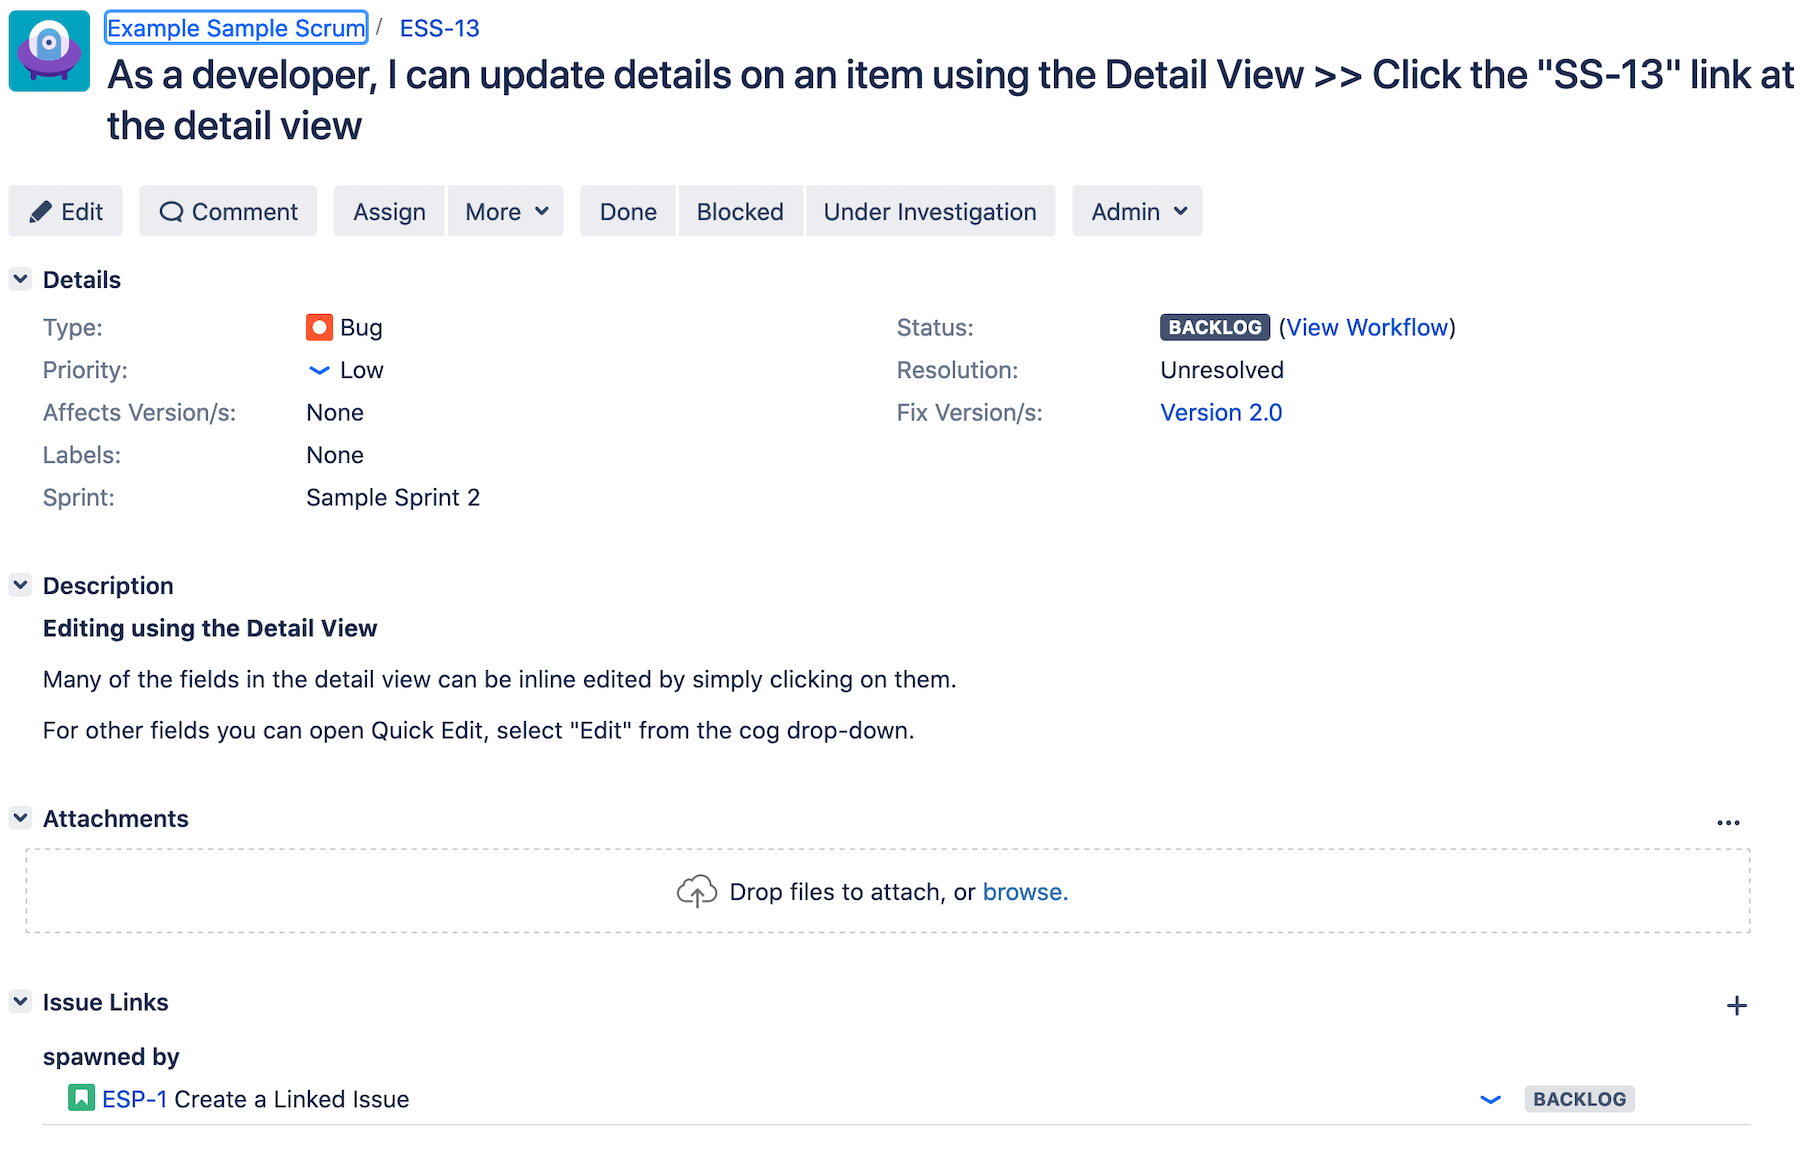
Fields are the pieces of information displayed on an issue screen. Paying close attention to what information should be shown to users, and how to display it, is a critical part of project management in Jira. For example, you can display important images in a field using rich text format or define whether filling out fields when creating, transitioning, or deleting an issue is optional or required.
You can add new fields to issue types used in your project as well, but any custom fields should be planned and discussed before inclusion to avoid confusion or redundancy. You can also delete fields other than those containing certain basic information like issue names.
You can configure fields by choosing Fields from the Issues menu and then selecting Field Configurations.

Screens
Screens in Jira allow you to create a collection of fields that will display at certain times. For instance, you could define different screens for issue creation and issue transitions. Screens are a key part of project management in Jira, as they allow you to tailor the information shown to team members at different stages of a process so they can keep relevant details in front of them without being overwhelmed.
To create a screen scheme or associate existing schemes with parts of an issue, select SCREENS from the Issues menu, then choose Screen Schemes.
Monitoring and Reporting
You can generate project reports in Jira to track important metrics like time to resolution for a specific group of issues or the ratio of newly created to resolved issues. To start creating reports, navigate to either your Kanban or Scrum board, then select Reports. To view all reports, click on Switch report and then choose All reports.
Some of the most useful reports are Time Tracking, which provides a comprehensive overview of how long your team is taking to complete issues, and Workload Pie Chart, which is a handy way to visualize the proportionate workloads of your team members.
Adapt Jira Project Management to Meet Your Needs
Making project management in Jira work for your organization takes much more than simply creating a project and telling your team to have at it. You need to use Jira’s seemingly endless customization options to find an approach to project management that meets your specific business needs, and then onboard your team members so they can spend their time resolving issues rather than figuring out how to integrate Jira into their daily work lives. And almost every business will need to add at least a few plugins to Jira to enhance the tool’s reporting and tracking capabilities or meet other unique project management requirements.
Contegix is an Atlassian Platinum Solutions Partner that can help you acquire, setup, and manage your Jira deployment. If you’re ready to align Jira’s project management capabilities with your organization’s requirements, talk to us today.